Hullo, All.
Six months ago(!) I played one of the best and most photogenic games of my life [link here]- a nod to the Battle of Hamburg against the entirely excellent Jon.
What I never got around for was the third installment: when Jon and I played the scenario from a few days later in April '45 as the Germans tried a desperate, last-ditch attempt to retake the city against a hasty British defence.
Obviously after half a year I won't remember the details, but it was a cracking match and I always fully intended to post the pretty pictures at least, so here goes!
 |
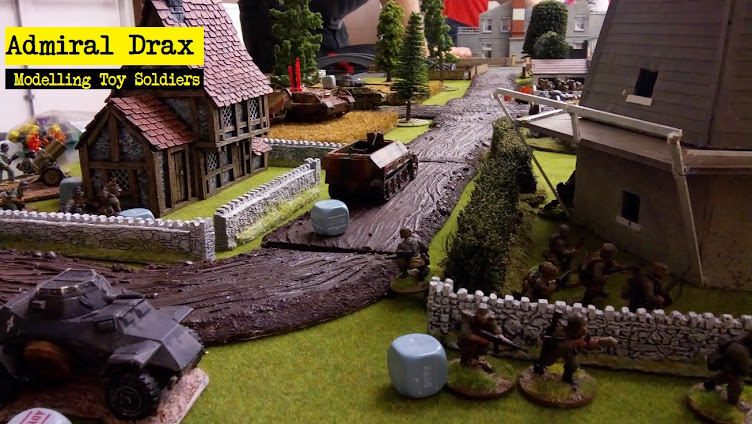
A gorgeous table again, as before. This time it was the
Brits who had the completely hidden (mapped) setup in
the town's outskirts - the Germans were attacking from
the green belt on the right of this pic. |
 |
My opening gambit: put a unit on 'Ambush'.
Jon's Opening gambit: send the Puma into the town... |
 |
...but we'd rolled to see whether the Puma had seen that
6pdr barrel sticking out of a window, and it hadn't... |
 |
| ..."Puma in open - 100 yards. Down safety...FIRE!" |
 |
The Puma was immobilised, and an understandably frustrated Jon
moved all of his troops into a solid thrust toward the town. |
 |
Sadly, my artillery FOO had called in some defensive fire,
and at the start of turn two, a barrage pinned 'em all!
MEANWHILE, in the middle... |
 |
....the Hetzer had moved up to very close range. Now,
this wasn't a concern for me - until I realised that it was
a sodding Flammpanzer! |
 |
| "AAAaaaargh!" - fwoooOOOOSH! |
 |
| The view from my back row (6pdr in that building, left) |
 |
Luckily for me, my PIAT survived the conflagration.
Unluckily for me, they only immobilised and pinned it. |
 |
Not wanting to just sit and shoot, I scooted some Toms
out to bring the fight to the Germans... |
 |
...sadly, neither flank could destroy the Hetzer, and
both were left quite vulnerable. |
 |
Jon realised this, and his centre - having rallied well - surged
forward to invest both the building and the ruin. Damn. |
 |
Luckily, my brave boys were able to fight their way in to
the building and put pressure on the enemy in the open. |
 |
| Higher ground! |
 |
To add insult to injury, and having finished off the Puma,
my 6pdr popped off a long-odds shot at the retreating
halftrack and blew it sky-high too. |
 |
Endgame. We had to call it: with no vehicles left, no
officer and mostly only inexperienced Volkssturm left,
Jon's attack had fatally stalled. A British victory. |
The game was great, and poor Jon was superbly resilient, given his daunting task and terrible luck.
These games really were amazing: proof (if t'were needed!) of just how very awesome home-brew narrative scenarios can really be!
...and I love those pics of the 6pdr lurking in the house - love 'em!
- Drax


Impressive and wonderful pictures (love the "windows ones"), a very nice and immersive batrep!
ReplyDeleteThank you! One day I shall play with two fully-painted armies amidst fully-painted scenery!
Delete‘‘Twas a great game mate. A ‘true-to-events-ish’ last ditch attack that failed in much the same way as the actual battle. One of my first jobs after moving is to get some pint slapped on those beauties! MDF just doesn’t cut it!
ReplyDeleteHa!
DeleteHullo, Mate.
Norway's not going to know what's hit it...!
What a fantastic game! You really do put together some of the best battle reports out there. Love reading these.
ReplyDeleteOh thank you, matey! Kind words indeed!
Delete